How to deploy a Django site using Apache and mod_wsgi on Ubuntu 14.04.
Introduction
In this tutorial, we will be deploying an Apache server that serves Django applications using the mod_wsgi Apache module. Apache with mod_wsgi is the recommended way to deploy Django production applications.
We already have a virtual python environment setup using virtualenv for this tutorial, if you are not sure how to set this up. you can see our tutorial on how to setup virtualenv.
Installing Apache and mod_wsgi
We can begin the installation process by installing Apache and mod_wsgi. We will be using Ubuntu apt-get to install Apache and mod_wsgi:
sudo apt-get update
sudo apt-get install apache2 libapache2-mod-wsgi
Configuring Django
We need to set the static_root option in Django settings to our static directory and then collect all static files to this directory.
Edit the settings.py file in your Django project and add the following line. Django will copy all static files in your Django application to this folder when we run the collectstatic command.
STATIC_ROOT = os.path.join(BASE_DIR, "myproject/static")
Now we can collectstatic by using the following command, this will copy all static files all over your Django application to the static directory we defined above.
python manage.py collectstatic
Configuring Apache
Now that we have Django static files covered, we can configure Apache to serve Django application using mod_wsgi. We need edit Apache default virtual host file using the following command:
sudo vim /etc/apache2/sites-available/000-default.conf
Now edit the default virtual host file to look like this. You have to replace text in red with your own project details.
<VirtualHost *:80>
    Alias /static /home/django/myproject/myproject/static

    <Directory /home/django/myproject/myproject/>
        <Files wsgi.py>
            Require all granted
        </Files>
    </Directory>

    WSGIDaemonProcess myproject python-path=/home/django/myproject/:/home/django/myproject/lib/python2.7/site-packages
    WSGIProcessGroup myproject
    WSGIScriptAlias / /home/django/myproject/myproject/wsgi.py
</VirtualHost>
Setting up permissions
We need to give Apache permissions to use files in our project directory, we can do that by using the command below.
sudo chown -R www-data:www-data /home/django/myproject/
Now use the following command to set permissions to the static directory.
sudo chmod -R 700 /home/django/myproject/myproject/static/
Once you have done that, we have to restart Apache to implement the changes we have made. Use the following command to restart Apache.
sudo service apache2 restart
You should now be able to access your Django site by typing the domain name or the server IP address to your web browser.
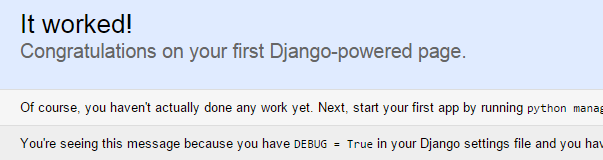
You should see a page similar to this if you are running a new Django website.
Related Articles
How to deploy a Django site using Apache and mod_wsgi on Ubuntu 15.04.
How to deploy a Django site using Apache and mod_wsgi on Ubuntu 16.04.


Comments
Add comment